How to take online campground reservations on your WordPress site
If your park's website runs on WordPress, it is already where campers find you. Whether they can book there too depends on which of four approaches you take, and each one costs you something different in bookings and in search.
By Lime Reservations · Published
Four ways to take bookings on a WordPress site
1. A “Book now” link to a separate booking site
The simplest option: a button that sends guests to booking pages your reservation system hosts. It is quick to set up, and keeping the booking engine running is someone else's job. The cost is that every guest leaves your site at the moment they decide to book, the pages they book on live at another address, and your own analytics lose them at the button. Done well — a booking site with your name, your colors and an address you can print — it is still a sound choice, particularly if your WordPress site is small. Lime's hosted booking portal is this approach.
2. An embedded booking widget
Many reservation systems offer a snippet that shows their booking pages inside a frame (an iframe) on yours. Guests appear to stay on your site, but what is inside the frame still belongs to the other site: search engines can't be relied on to count it as your page, your theme's fonts and colors don't reach inside it, and a frame that has to guess its own height can be awkward to scroll on a phone. It is a quick fix rather than a native part of your site.
3. A general-purpose booking plugin
WordPress has booking plugins built for hotel rooms, vacation rentals and appointments, and they keep bookings inside WordPress itself. They can work for a handful of cabins. For an RV park, check carefully whether one models what you actually rent — rig length, hookups, site types, seasonal rates — and remember that unless your front desk also works inside WordPress, every phone booking has to be entered in two places, or the website will eventually sell a site that is already taken.
4. A plugin connected to your reservation system
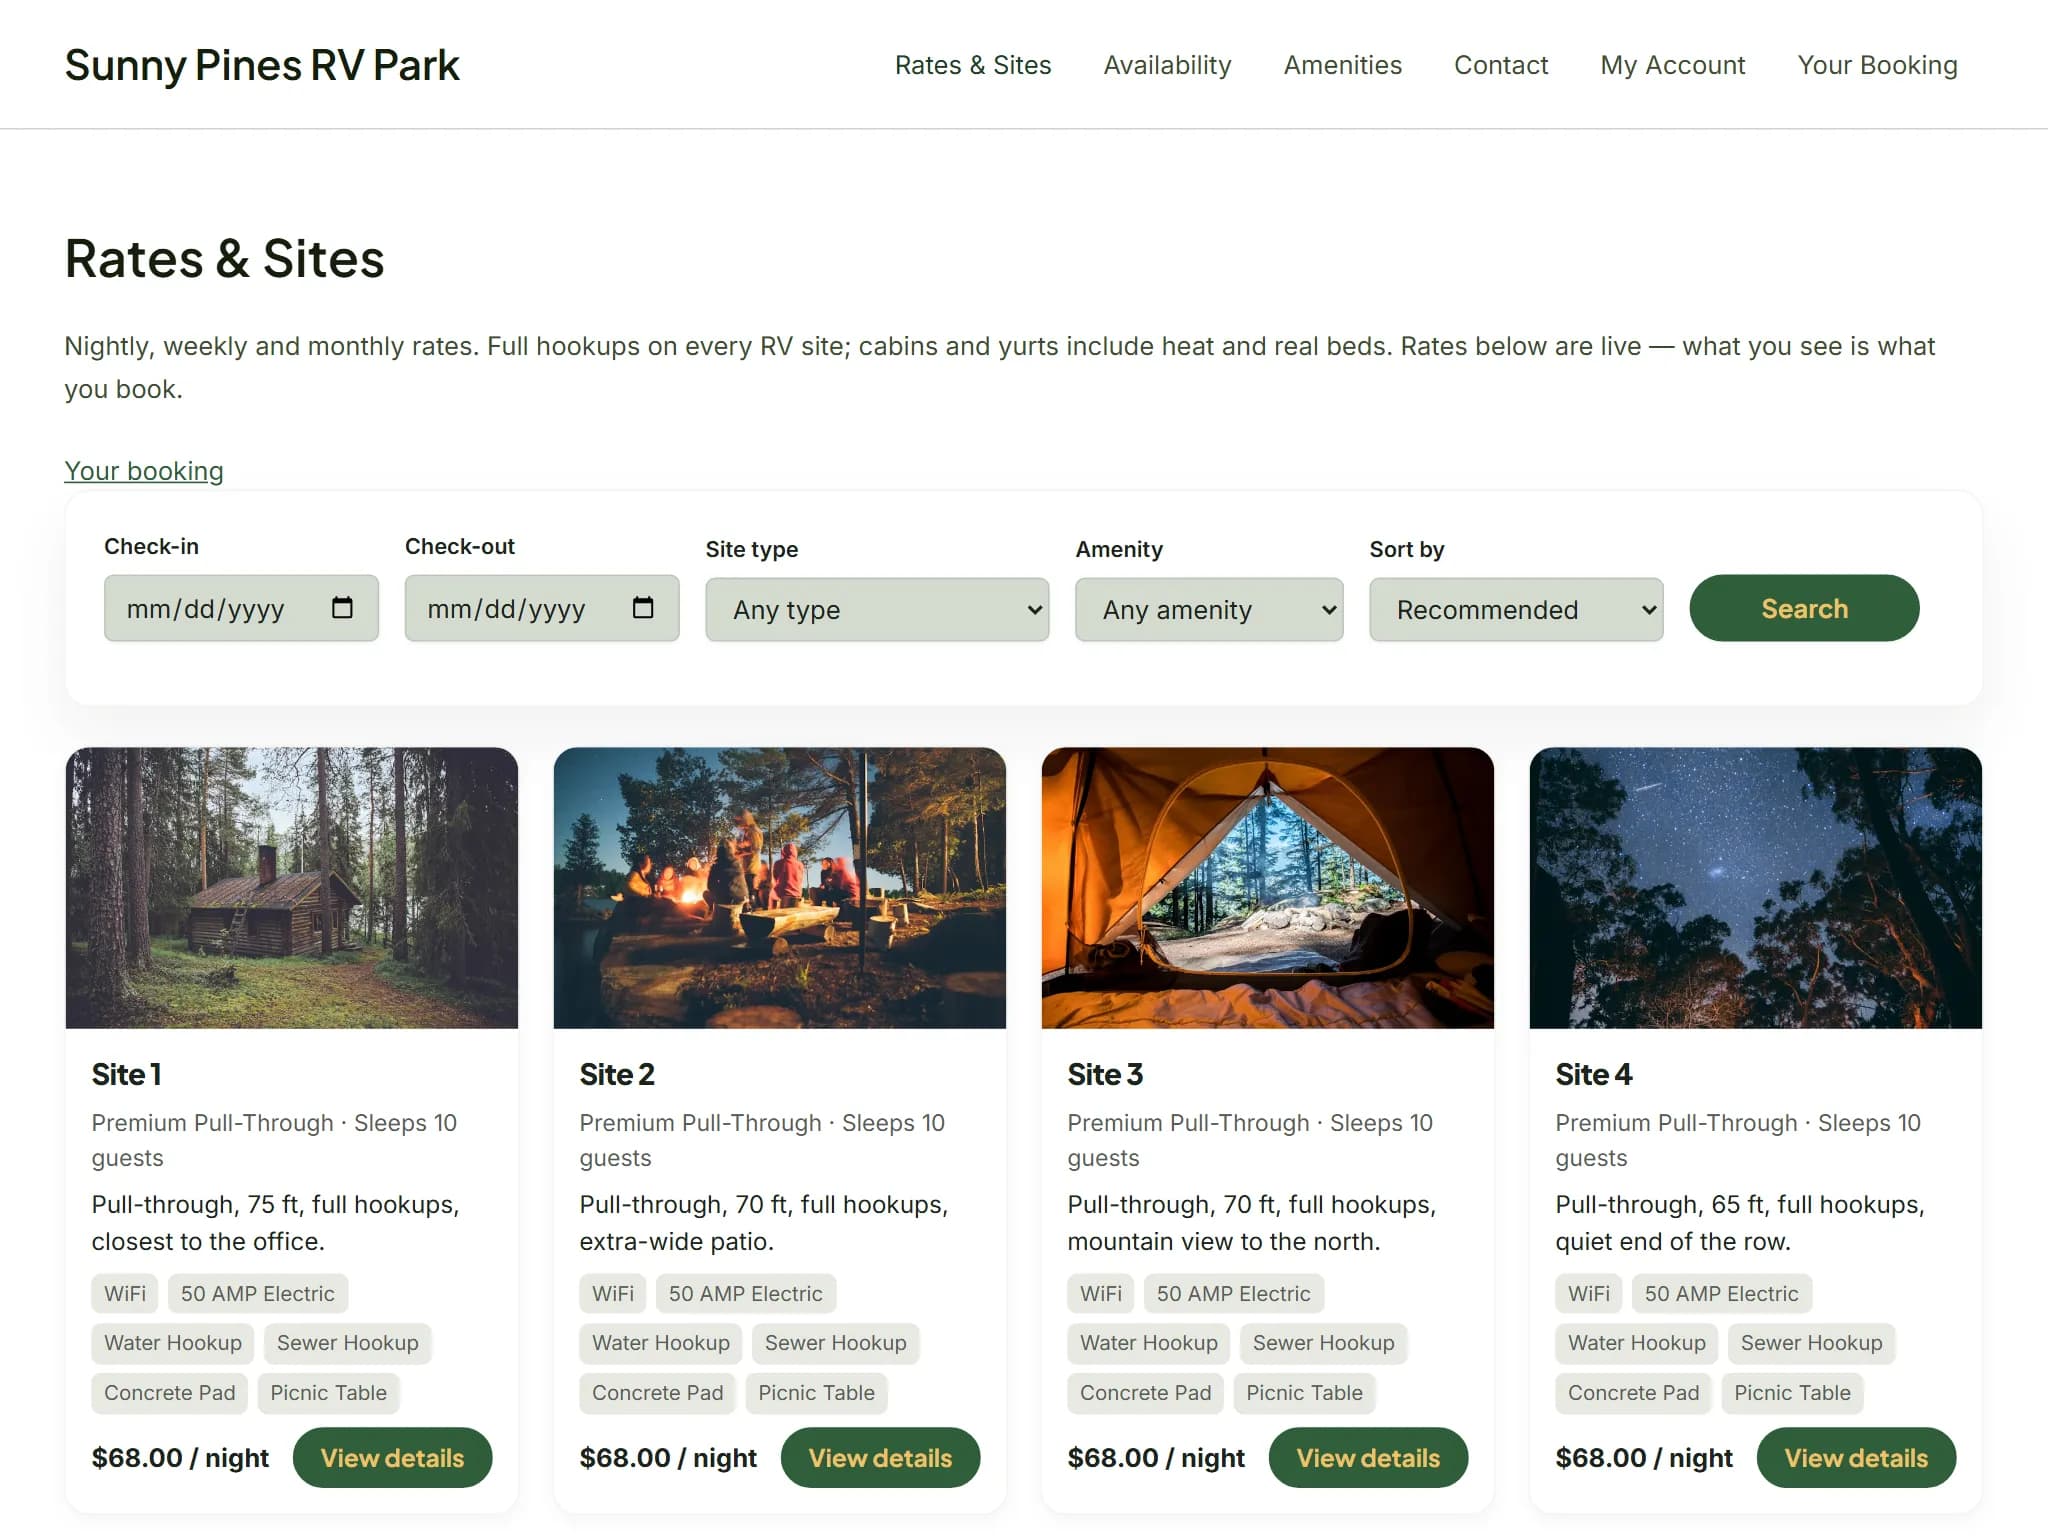
The fourth approach puts your reservation system's live inventory into WordPress as native pages. Site lists, availability, prices, the cart and the checkout render in your theme, on your domain, while the bookings land in the same system your front desk uses. That is how the Lime Reservations WordPress booking plugin for campgrounds works, and the rest of this guide uses it as the example.
What to check before you choose
- Your host allows the WordPress REST API. It lives at
/wp-json/and is on by default, but some hosts and security plugins block it — and live calendars, quotes, carts and checkouts that run through it stop working when they do. - Page caching. A booking page cached for an hour shows hour-old availability. Ask how a plugin keeps availability fresh behind a full-page cache.
- Card data. Look for card fields hosted by the payment processor, so card numbers never reach your WordPress server.
- One inventory. Phone bookings and website bookings must come out of the same availability, or sooner or later you will double-book.
- JavaScript. Most modern booking needs JavaScript in the visitor's browser. Ask what a visitor without it sees.
- Phones. Before launch, book a stay on your own phone, start to finish.
Setting it up with the Lime Reservations plugin
Here is the whole job in order. The plugin installation guide has every setting in detail.
Before you start
- A Lime Reservations account with your sites and rates set up.
- Your park's Square account connected in Lime. A park needs Square before it can take bookings on WordPress.
- WordPress 6.2 or newer, PHP 8.1 or newer, and the REST API reachable.
The steps
- 1In your Lime admin, choose WordPress as your booking front-end under Guest Portal → Settings, and enter your website's address.
- 2Still in Lime, go to Settings → Integrations → WordPress and generate an API key.
- 3Download the plugin zip from our WordPress plugin page, then in WordPress upload it under Plugins → Add New → Upload Plugin, install it and activate it.
- 4Open Settings → Lime Reservations, paste the key and click Connect. Your park's name appears once it is linked.
- 5Create your booking pages and add a shortcode to each, or the matching block: search for “Lime” in the block inserter.
- 6Back in Settings → Lime Reservations, choose your Cart, Checkout and Confirmation pages. Guests need all three to book and pay on your site.
- 7Book a stay yourself, on a phone, from search to confirmation, then refund it from the reservation in Lime.
Which shortcode goes on which page
A typical layout for a campground site. You don't need every page; you do need the cart, checkout and confirmation.
| Page | Shortcode | What guests see |
|---|---|---|
| Book or Sites | [lime_reservations] | Search, the matching sites and each site's detail, all on one page. |
| Availability | [lime_availability] | Your sites by night in a grid. Guests can pick stays on several sites and add them to the cart together. |
| Park map | [lime_map] | The map you drew under Settings → Maps, each site colored by availability for the guest's dates. |
| Cart | [lime_cart] | The sites a guest is holding, with the hold countdown, extras and the total. |
| Checkout | [lime_checkout] | Contact and vehicle details, your cancellation policy and card payment. |
| Confirmation | [lime_confirmation] | The order number, what was booked and your check-in information. |
| My stays | [lime_account] | Guest sign-in and registration, their profile and their stays at your park. |
| Menu or sidebar | [lime_cart_link] | A link to the cart with a count badge. |
To feature one site in a blog post or a landing page, use [lime_site id="…"] with the site's ID from your Lime admin, and [lime_search] puts a date search on your home page. The plugin page lists every shortcode with its options.
What your guests need, and what they get
Guests browse your sites, prices, photos and availability as ordinary pages on your domain, in your theme, and those pages stay readable with JavaScript switched off. Holding a site, paying and reading the confirmation need JavaScript, which every mainstream browser has on by default.
Card details go from the guest's browser into Square's own payment fields; only a one-time payment token reaches your WordPress server. Dated availability and quotes are never more than a minute old, even behind a full-page cache, and the plugin sets no cookies of its own. On pages with booking content it can load Google Analytics, which does set Google's cookies, reporting to your park's own measurement ID and to Lime's — the same pair the hosted portal reports to. A switch in the plugin's Display settings turns that off.
You can try the result before installing anything: our WordPress demo park takes its bookings through the plugin on an ordinary WordPress theme.
If WordPress isn't the right home for booking
Not every park should book on WordPress. If your site is a single page, is rarely updated, or isn't WordPress at all, the hosted booking portal is a complete booking site at your own branded address that you link to from wherever guests find you. A park uses one or the other, at the same price, and can change its mind later in the Lime admin. Weighing systems more broadly? Start with our checklist for choosing RV park reservation software.
Keep reading
- WordPress booking plugin for campgrounds and RV parks
The Lime Reservations plugin: features, the full installation guide, every shortcode and block, and the download.
- Online campground reservation system
How a booking works from search to confirmation: live availability, cart holds, deposits and Square checkout.
- How to choose RV park reservation software: a checklist
Write down how your park runs, then hold every system to the same checklist — calendar, online booking, payments, staff access, price and getting started — with the questions worth asking in a demo.